Malcolm Crowe
-
Posts
1,760 -
Joined
-
Last visited
Content Type
Profiles
Forums
Blogs
Downloads
Articles
Gallery
Everything posted by Malcolm Crowe
-

Request: ACIS Assembly Format (.asat)
Malcolm Crowe replied to Malcolm Crowe's topic in General Discussion
Another year, another reminder. Is there any reason why the .asat file format can't be added for importing and exporting? Malcolm -
This still doesn't work in 2022 PU1.
-
Thanks Cary. I wondered whether the new Reset UI was for simplifying the clearing of the XML files. Having reset the UI to the default settings, much time is then wasted having to manually recreate our customized UI. The "Menu/Tools/Load UI Config" still doesn't work. This continues to be an ongoing irritation for us, and has been mentioned many times before. Malcolm
-
We just did the same update process (using the patch) on a second PC, and the Ribbon did update as expected. ???? Malcolm
-
Can IC2022 open IC2022 PU1 files?
Malcolm Crowe replied to Malcolm Crowe's topic in General Discussion
Thanks for confirming Kevin. It's problematic for me at the moment as I need to start a new project using PU1 (we've been waiting for the new "Link Body" tool), while also continuing existing client projects without PU1. IRONCAD doesn't allow to have both 2022 versions on the same machine. Malcolm -
The "Structured Parts" Tab of the Ribbon Menu didn't update after installing the PU1 Patch. It was necessary to remove it from the Ribbon and to then add again for it to display the new "Link Body" tool. Malcolm

-
Normally after a major product update I wouldn't expect to be able to open files created in it, within an earlier version. However, IC2022 PU1 appears more like a patch than a typical major product update. Installation doesn't create a separate application IC 2022 PU1 alongside IC 2022. Can files created using IC 2022 PU1, be opened and edited by users running IC 2022? The Installation Read Me file says no (which is typical), but IC 2022 PU1 seems different to previous product updates. Malcolm
-
Thanks for the reply Kevin. The ability to create tangent 3D Curves isn't just a "nice to have", but is a "must have". So when that was lost with the changes in IC2022 it was a critical tool that was lost for users who need to work with 3D Curves. I have an IRONCAD client (on software subscription) who hasn't been able to upgrade from 2021 PU1, because all of their boat hull designs involve tangent 3D Curves within the construction of their models. Restoring this functionality needs to be a high priority. So hotfix please. Malcolm
-
I'm guessing that 2022 PU1 isn't far away from release. Will the "Create Smoothly Connected Curves" tool be restored in this next release? Some of us are still needing to use 2021 PU1 because of this lost functionality in 2022. Malcolm
-
Hi MC. LEE, IRONCAD can handle this part just fine, but it requires a better understanding of mold cavity and core design techniques using the various surfacing tools. That is, after extracting the main surfaces (as per the demonstration videos), other surfacing tools need to be used for closing gaps for blanking surfaces. This part also requires moving side cores in the mold cavity for the holes, and the core needs a sliding element as well for the notch in the rib. This is a more complicated part, if you're a novice to mold design. There would be a lot to demonstrate in how to do this (and the reasons why), and I simply don't have time. Malcolm
-
CAXA's BOM capabilities are quite powerful and useful once you understand it. Check the "Merge Options" within the "Fill in BOM" dialog box that you've shown. This is where you select what properties to look at when merging. Attached is a video prepared last year for another user, that may be helpful to you. Let me know how you get on. Malcolm CAXA - BOM - Merging Items.mp4
-
Printing - Color Configurations (CAXA)
Malcolm Crowe replied to Malcolm Crowe's topic in Tips and Tricks
Hi Martijn, Attached is an updated video (with audio) demonstrating how to load and save Print Styles and Print Linetypes within CAXA DRAFT. Hopefully this answers your question regarding how to open the Linetype Settings dialog box, while also demonstrating other things that may be of interest. Malcolm CAXA - Printing - Loading and Saving Styles.mp4 -
Nice job Tom. A couple of points that from a users perspective I think is important to be aware of: 1. DXF Import only works for faceted DXFs. It won't work with solid models (DXFs that contain ACIS solids). Therefore, the DXF import capability is quite limited in its real world usefulness. So I think that this capability should be clarified with "(faceted geometry only)". 2. IFC Import. This only imports the geometry within the IFC file, and not any of the BIM data. So I think that this capability should be clarified with "(geometry only)". These comments are applicable to IRONCAD's own TRANS information also. Malcolm
-
Hi Heinrich, Within CAXA DRAFT the Item Numbers are associated with the BOM and Generated View within that particular tab (model or layout). If your Generated View is in Model Space but your BOM is in Layout Space then the Item Numbers won't work (as you have discovered). There are different work-arounds, but in the attached video I demonstrate one (others may choose to demonstrate other methods). This involves adding a hidden BOM within Model Space (where the Generated View is) and then adding the Item Numbers within Model Space also. The Paper Scale within Paper Settings is then used to scale the annotations within Model Space so that they appear at the correct scale in the Viewport within Layout Space. Malcolm CAXA - Item Numbering with Viewports.mp4
-
Split Item Bubble for BOM - mix different properties
Malcolm Crowe replied to IronKevin's topic in Tips and Tricks
The link below to a previous post demonstrates that CAXA DRAFT can do this also. You can combine any combination of Properties from the BOM, either as single or multiple lines (one above the other). The last video in the previous post demonstrates this. So there is a lot of flexibility regarding this in CAXA DRAFT. Tip: Item Numbers - Displaying Properties from 3D Model (CAXA) - Tips and Tricks - IronCAD Community Malcolm
-
Hi Harley, We use the same method mentioned by Cary (that is "Closed Corner"). However, we sometimes use a parameter for driving the value of this Gap, where the value of that Gap Parameter is driven by the Bend Radius. We do this when we want the corner to automatically adjust when we make changes to the Bend Radius. Attached is a previous video demonstrating this. Malcolm IRONCAD - Sheet Metal - Controlling Corners of Out Bends.mp4
-
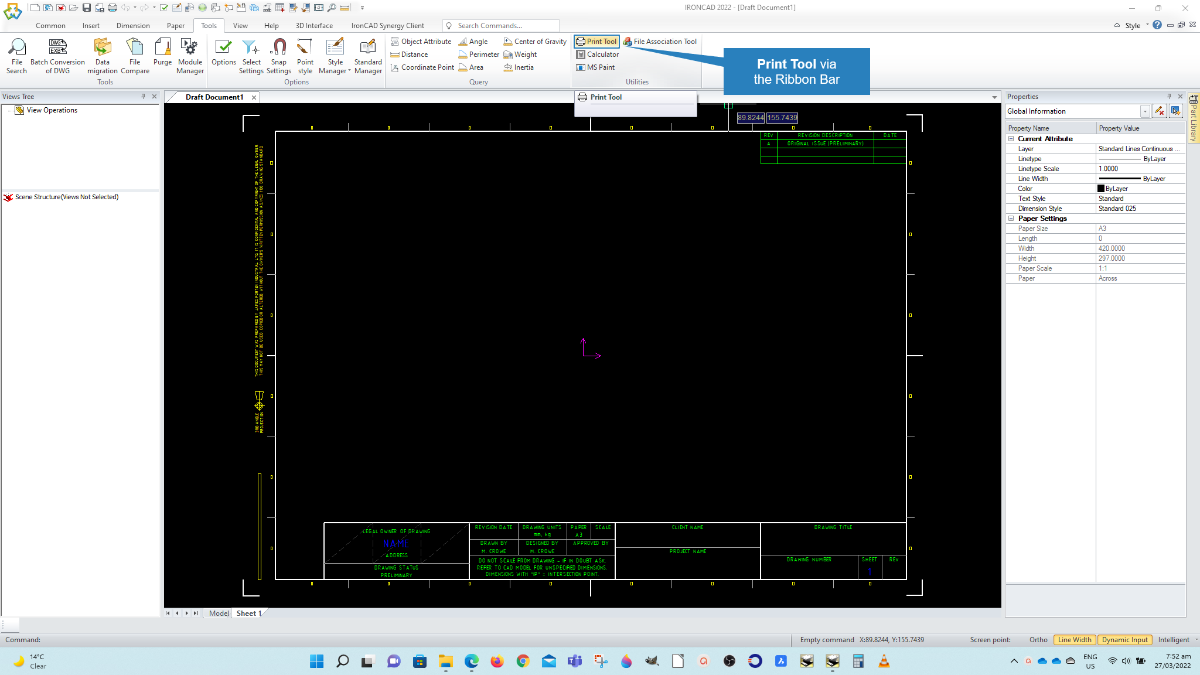
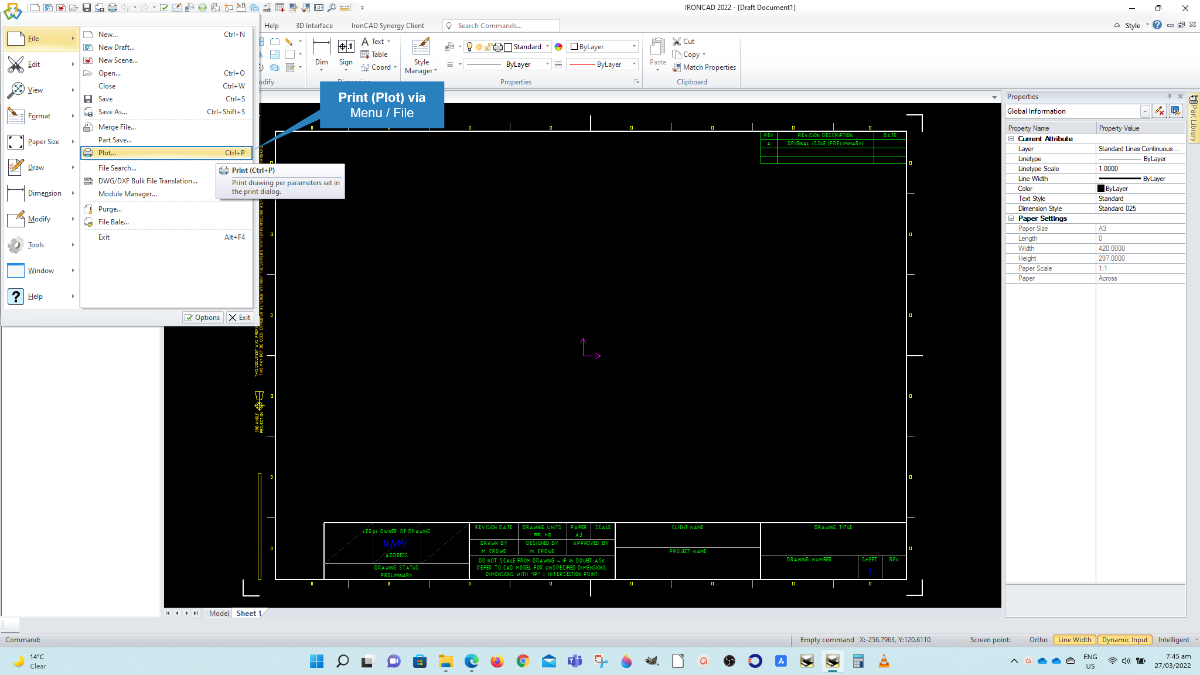
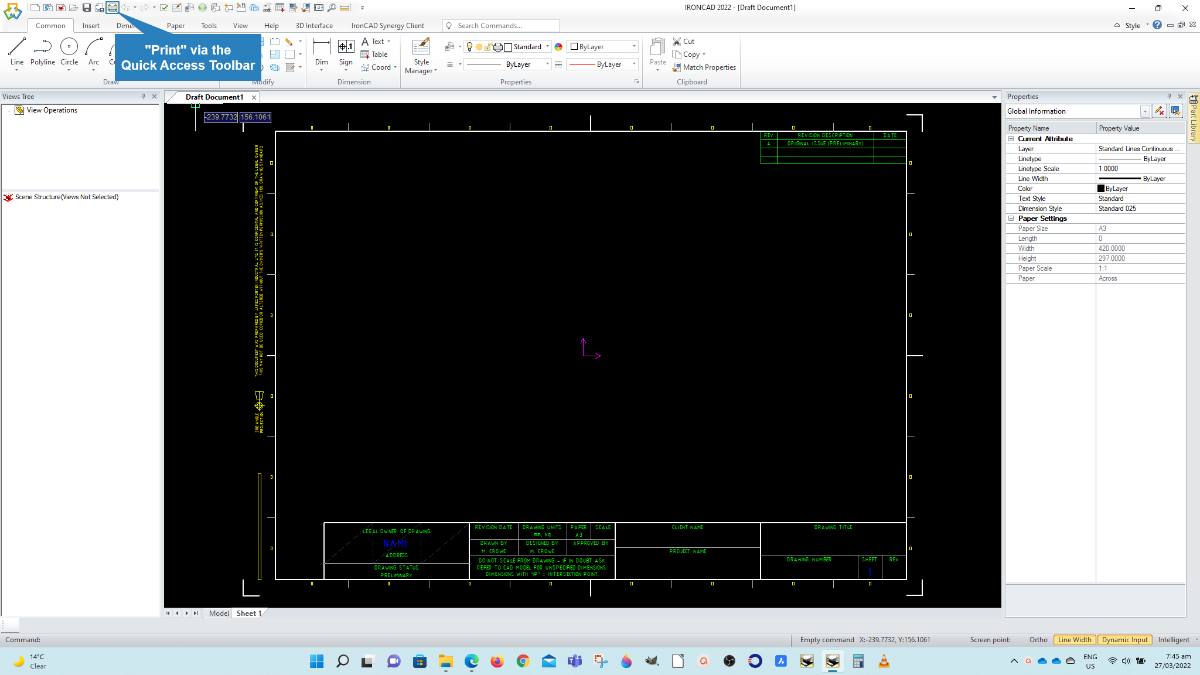
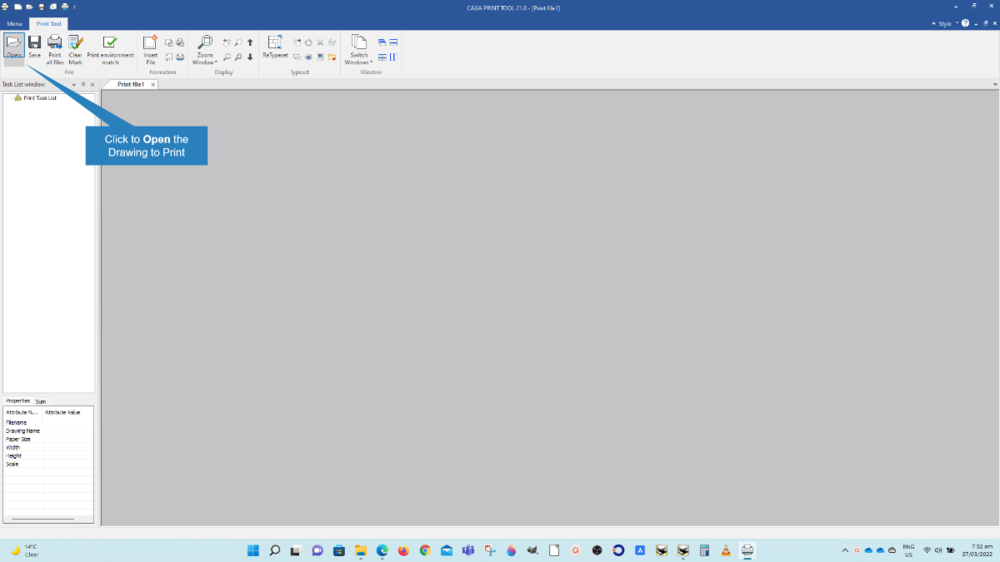
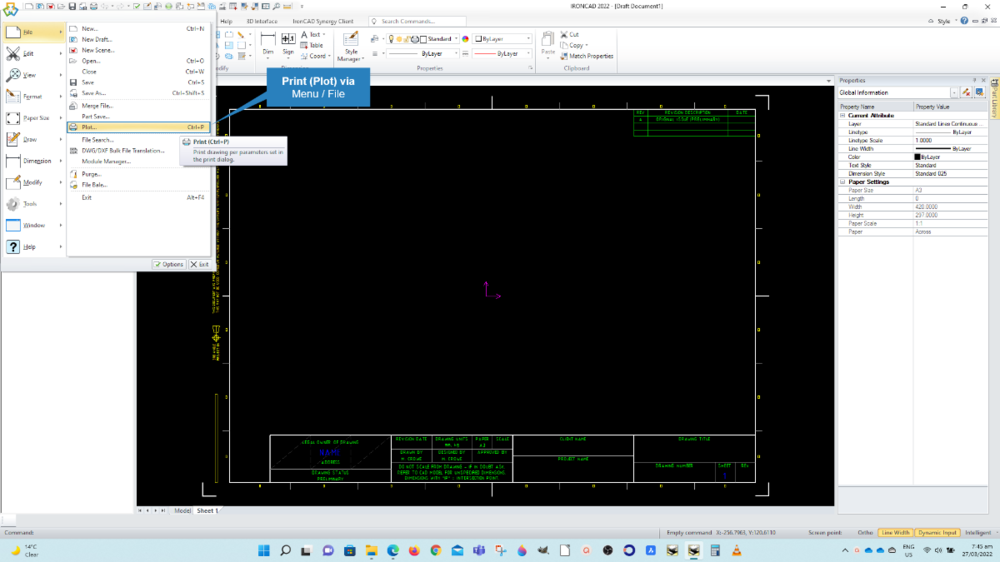
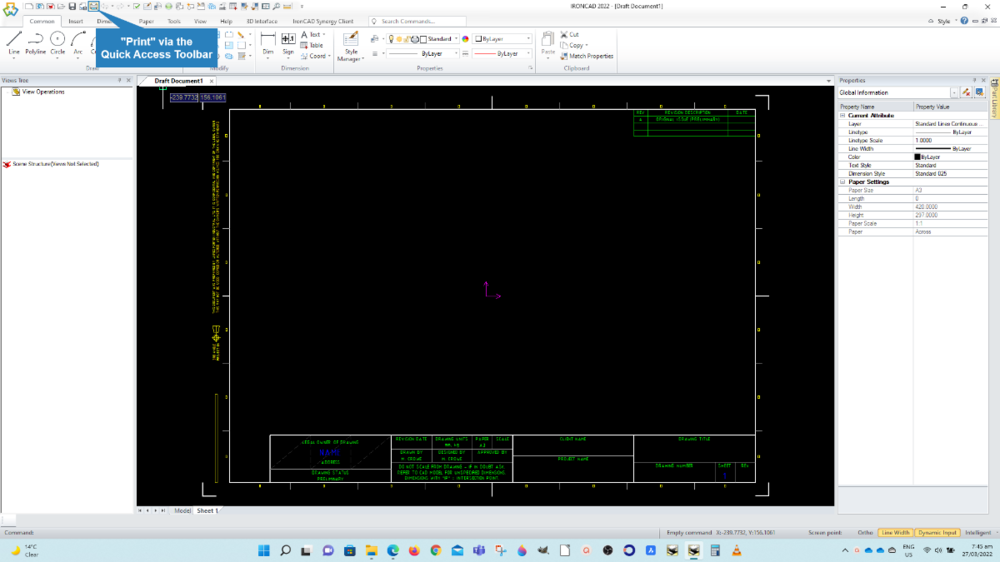
Hi Alan, There are 2 options for printing within CAXA DRAFT. 1. Print (for printing the current sheet only). 2. Print Tool (for printing multiple sheets on roll-fed printers or PDF printers). The attached video is similar to what Kevin posted above, but goes into more detail. In this video I'm using PDF24 as it allows joining the individual sheets into a single file after creating them. PDF24 is a free versatile PDF printer. I hope that helps. Malcolm CAXA - Printing Multiple Sheets to Single PDF File.mp4

-
Tagging sectioned parts in CAXA sectioned view
Malcolm Crowe replied to ATURNER's topic in General Discussion
Hi Alan, That makes sense. Thanks for the update. For your interest (and other users), attached is a video demonstrating what happens to Item Numbering when the link to the 3D Scene is broken. The video also demonstrates how to restore the missing link between CAXA and the 3D Scene. Malcolm CAXA - Item Numbering - Restoring Link to 3D Scene.mp4 -
Tagging sectioned parts in CAXA sectioned view
Malcolm Crowe replied to ATURNER's topic in General Discussion
Hi Alan, This isn't the normal behavior within CAXA DRAFT. Have a look at the attached video to see whether you are doing anything different. Malcolm CAXA - Sectioned Views - Item Numbering.mp4 CAXA - Sectioned Views - Item Numbering.ics CAXA - Sectioned Views - Item Numbering.exb -
BOM (bill of material in Caxa Draft)
Malcolm Crowe replied to Ramogale's topic in General Discussion
Hi Alan, No the parts don't need to be copies or links. They can in fact have totally different geometry. When it comes to merging in BOMs, the only information that matters are the values in the Part Properties that the BOM is looking at. If you have two different parts that share the same Part Properties then the BOM will treat these parts as the same. Within the "Merge Options" of CAXA, you can define the Part Properties that CAXA uses for merging. For example, if you choose Part Number then it will merge all parts that share the same Part Number (regardless of whether the geometry is the same or not). If you were to choose Material, then CAXA will merge all parts that share the same Material. Attached is a previous video created regarding "Remerging". Hopefully this will give you some insight into using the merge option with CAXA's BOM. Malcolm BOM Remerge All Same.mp4 -
CAXA Draft Section View for Surface Part
Malcolm Crowe replied to LEE MENG CHE's topic in General Discussion
While the "Section View" command within CAXA DRAFT won't work with a Surface Part, it is possible to create a "Sectioned Configuration" within the 3D Scene and to then project a view within CAXA DRAFT that references that "Sectioned Configuration". See the attached demonstration video. We use this technique when we want to create a sectioned isometric view of a part or assembly within CAXA DRAFT. Malcolm CAXA - Sectioned View of Surface Part.mp4 CAXA - Sectioned View of Surface Part.ics -
Hi Kevin, I'm one of those experienced users that didn't know that tip. Thanks. Malcolm
-
Attached is a video from a post 11 months ago demonstrating how to print multiple sheets at once using the "Plot Tool" in CAXA DRAFT. I hope that helps. Malcolm CAXA - Printing Multiple Sheets to Single PDF File.mp4
-
Not that I'm aware of regarding the regular "Print" tool (for sheet-fed printers). However, it is possible using the "Plot Tool" (for roll-fed Printers). Malcolm
-
Not that I'm aware of, but someone else might. Malcolm