The TriBall - Covering the Fundamentals
IronCAD’s most powerful tool might have more functionality than you know. In this article we will discuss some of the TriBall’ s functionality to helping you work more efficiently; this list will also include new functionality pertaining to IRONCAD 2019 PU1.
The Triball Consists of a few basic parts: The Inside Handles, The Outside Handles, The Outside Planes, and the Ring. We will discuss each one individually
The Inside Handles:
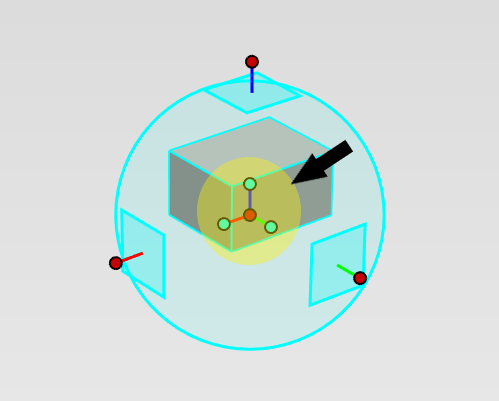
The inside handles are great tools for Orientation and positioning your Parts. The Blue handles shown can use to orient your parts to edges, points, and faces, just by either right-clicking them, or by doing a left click drag.
The Inside dot allows users to drag the part by the TriBall to your notable features in your scene, and allows the user to right click and use the specific option to line up with the center of a circle, editing distance from a point, or by going to the midpoint of two selected locations. This tool is crucial to the IronCAD design Philosophy, so be sure to explore all the functions it offers.
The Outside Handles:
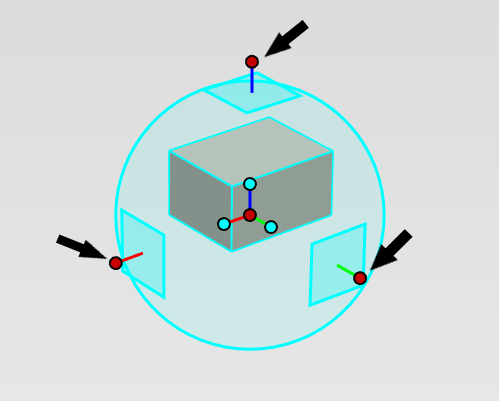
The outside handles on the Triball Can be used in many ways. Firstly, the Handles can be locked by Left-clicking on them. this allows the user to restrict the direction that the part can move to the one axis you select. Doing so, you can drag the handle using a left click for a simple movement, or a Right Click for more options. These options will include creating a pattern and creating copies of the part/Feature selected.
Clicking the outside handle and then right-clicking middle dot inside the triball will allow you to move the Triball using the Inside Handle controls while being locked to a single axis of movement.
Finally, the Outside handles are great for rotating parts. Select an outside handle with a left click and the left tor right-click anywhere in the empty space inside the ring. That will allow you to rotate your part, or create Radial patterns.
Outside Planes:
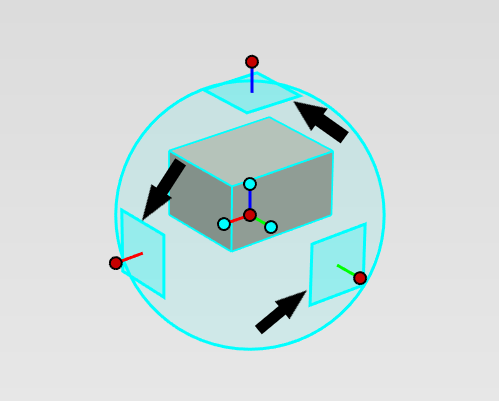
the outside planes offer much of the same functionality that the outside handles do, but allow for two degrees of movement instead of one. They can be locked like the outside handles, and use the inside red dot to move in a specific manner.
The Ring:
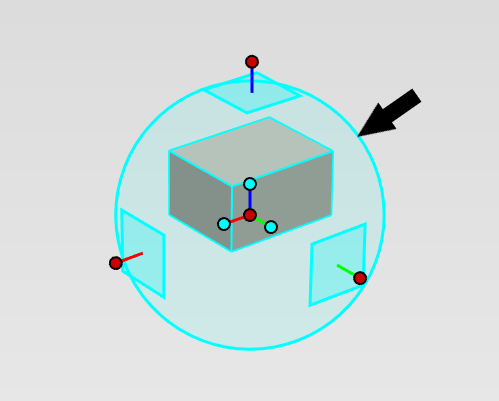
The Triball ring offers some nice tools for users that look directly down at their parts. By default, the Ring will allow the user to rotate their parts orthogonally. (This feature can be deactivated for users concerned about accidentally creating slight changes to the orientation)
If you are looking down one of your parts, with an outside handle lining up with the center dot, The ring can be used to lock the overlapping outside handle. This allows users to not have to rotate their camera in order to rotate their parts. See example below:
The Unlock Ability:
The Unlock Ability is the final piece of the TriBall that allows it to be so versatile. By pressing the Space Bar, you can make the Triball move and orient independent of the associated part. This functionality is critical to line up your parts as well as create linear patterns. the video below orients the parts using the unlock ability along with other TriBall functions.
We include this file with every installation of IronCAD so that users can practice getting comfortable with the mechanics of the TriBall. Find the file under (C:\Program Files\IronCAD\2019\Tutorials\en-us\triball1.ics) and try using the topics we discussed in this article.


2 Comments
Recommended Comments